How it works
Let’s use a real-world example to understand how Itzam works. Imagine you want to create an AI support chat.Workflow
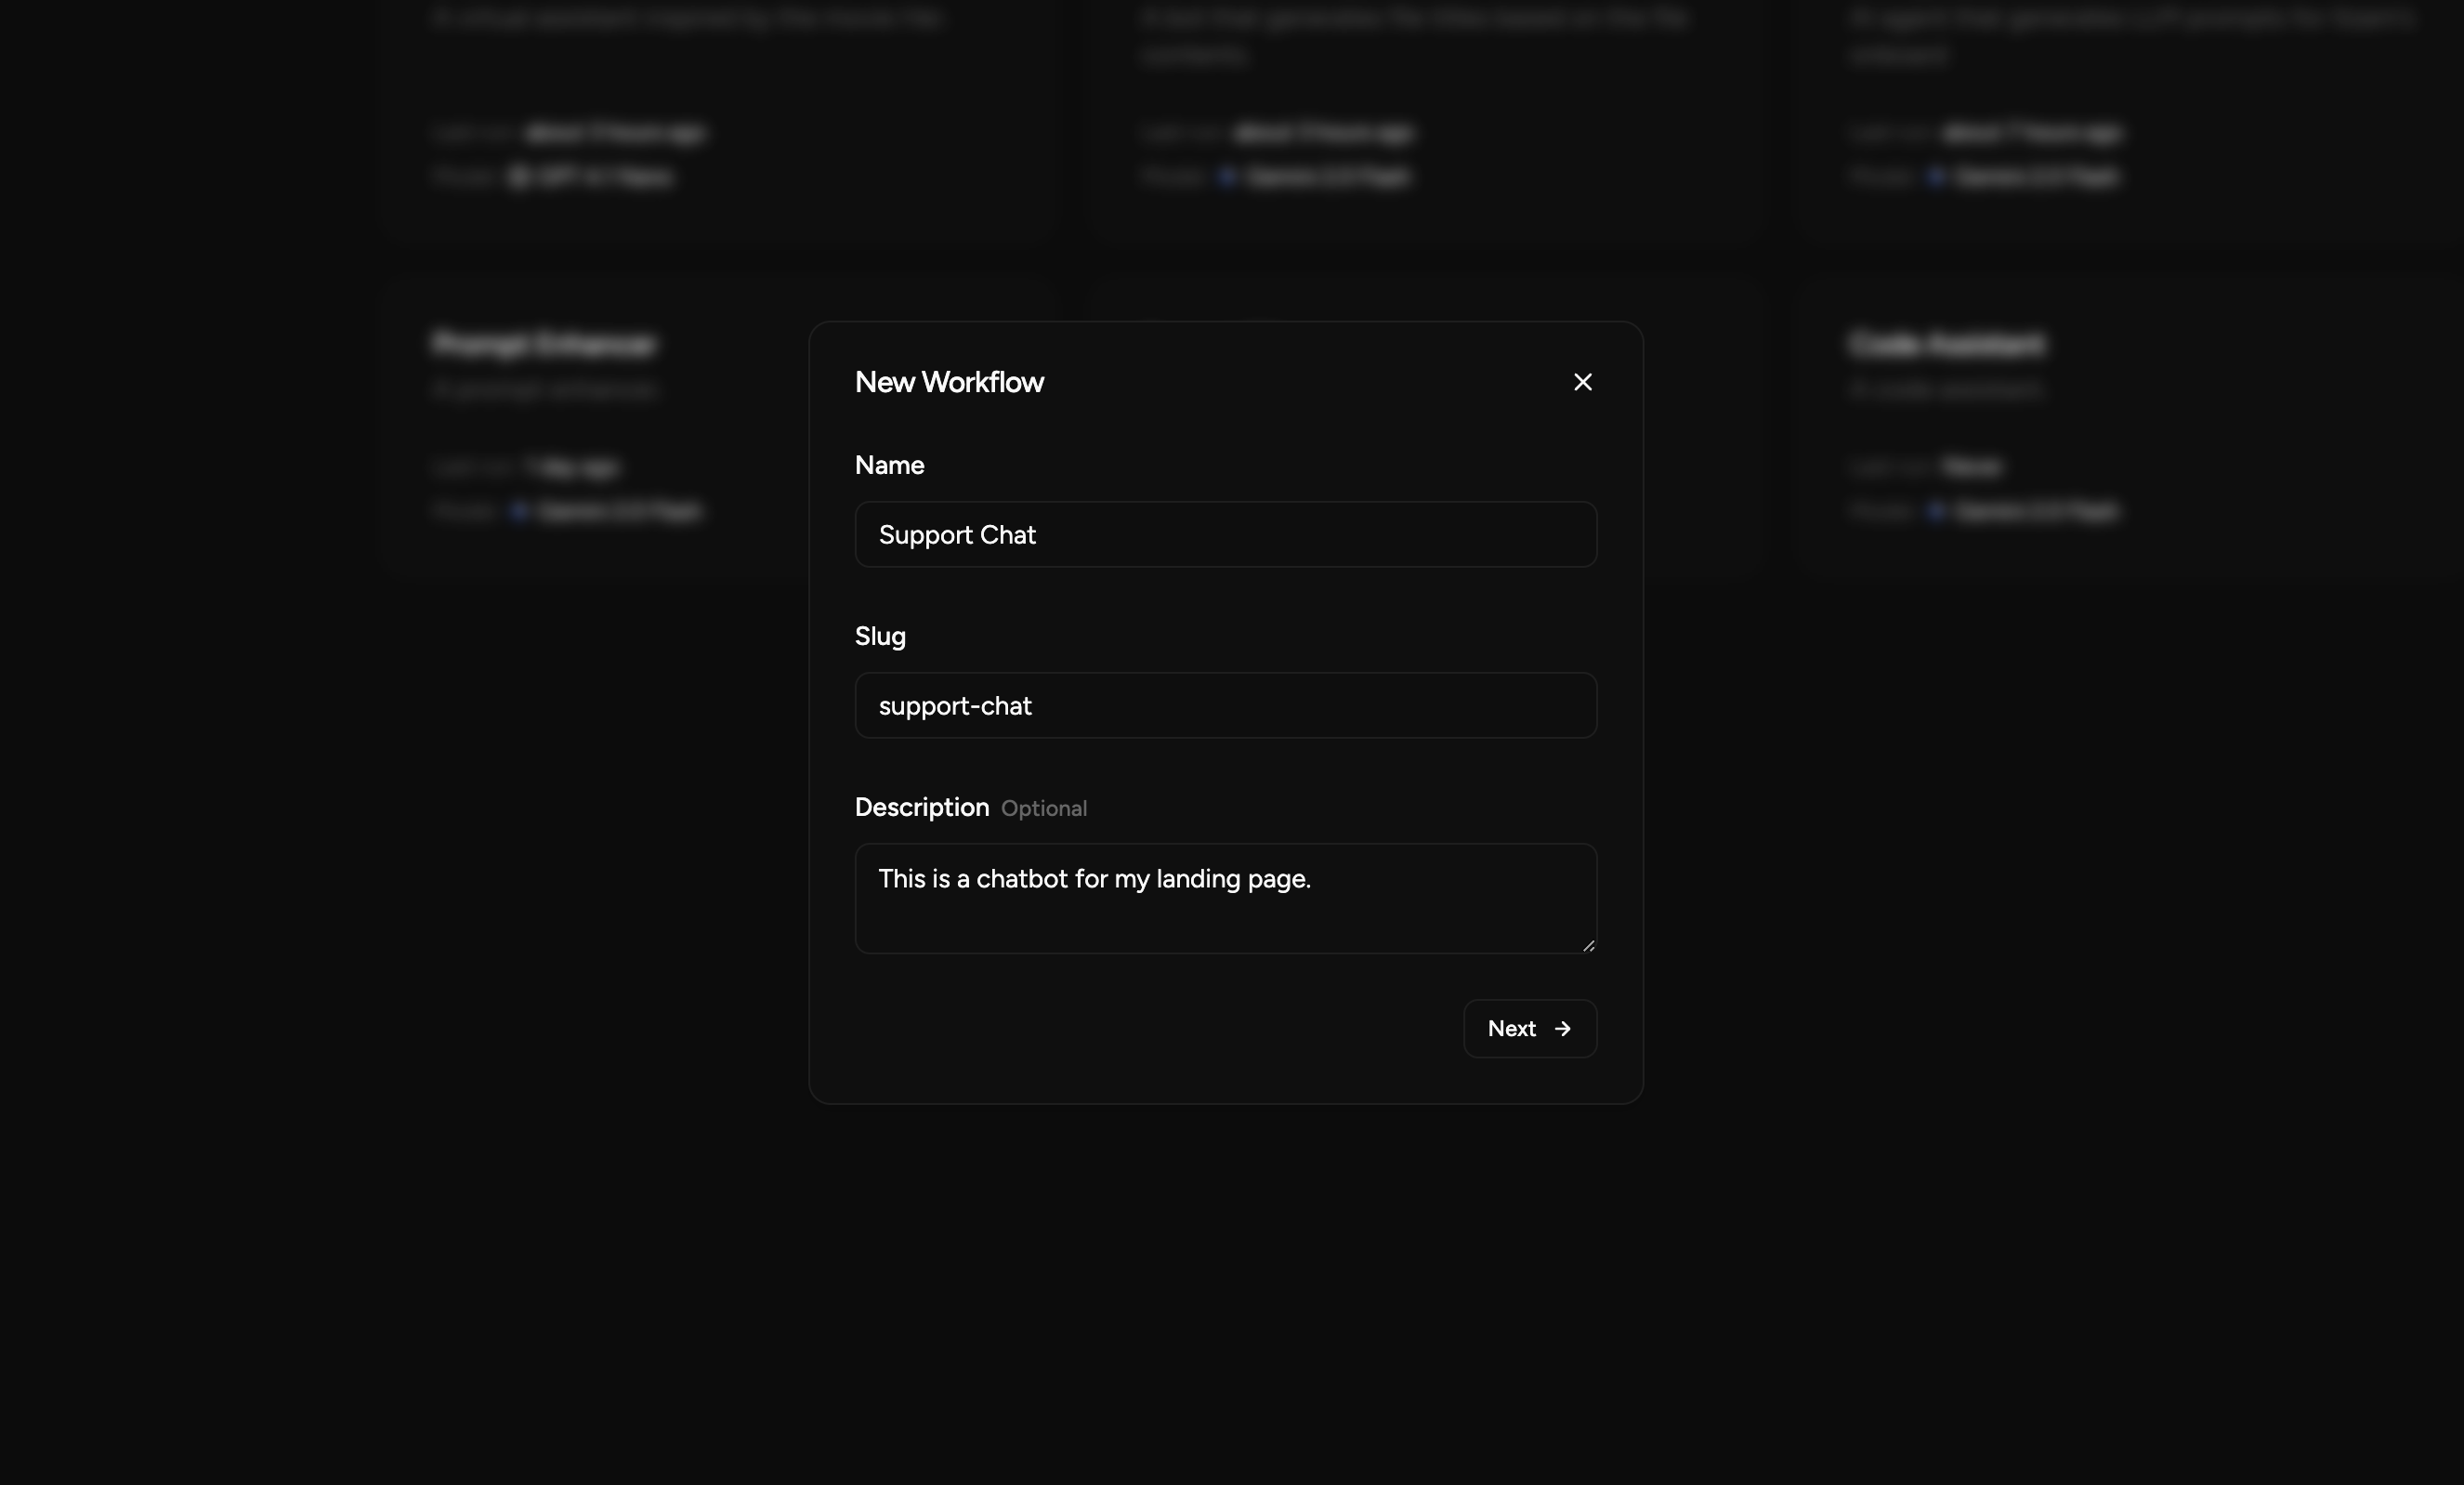
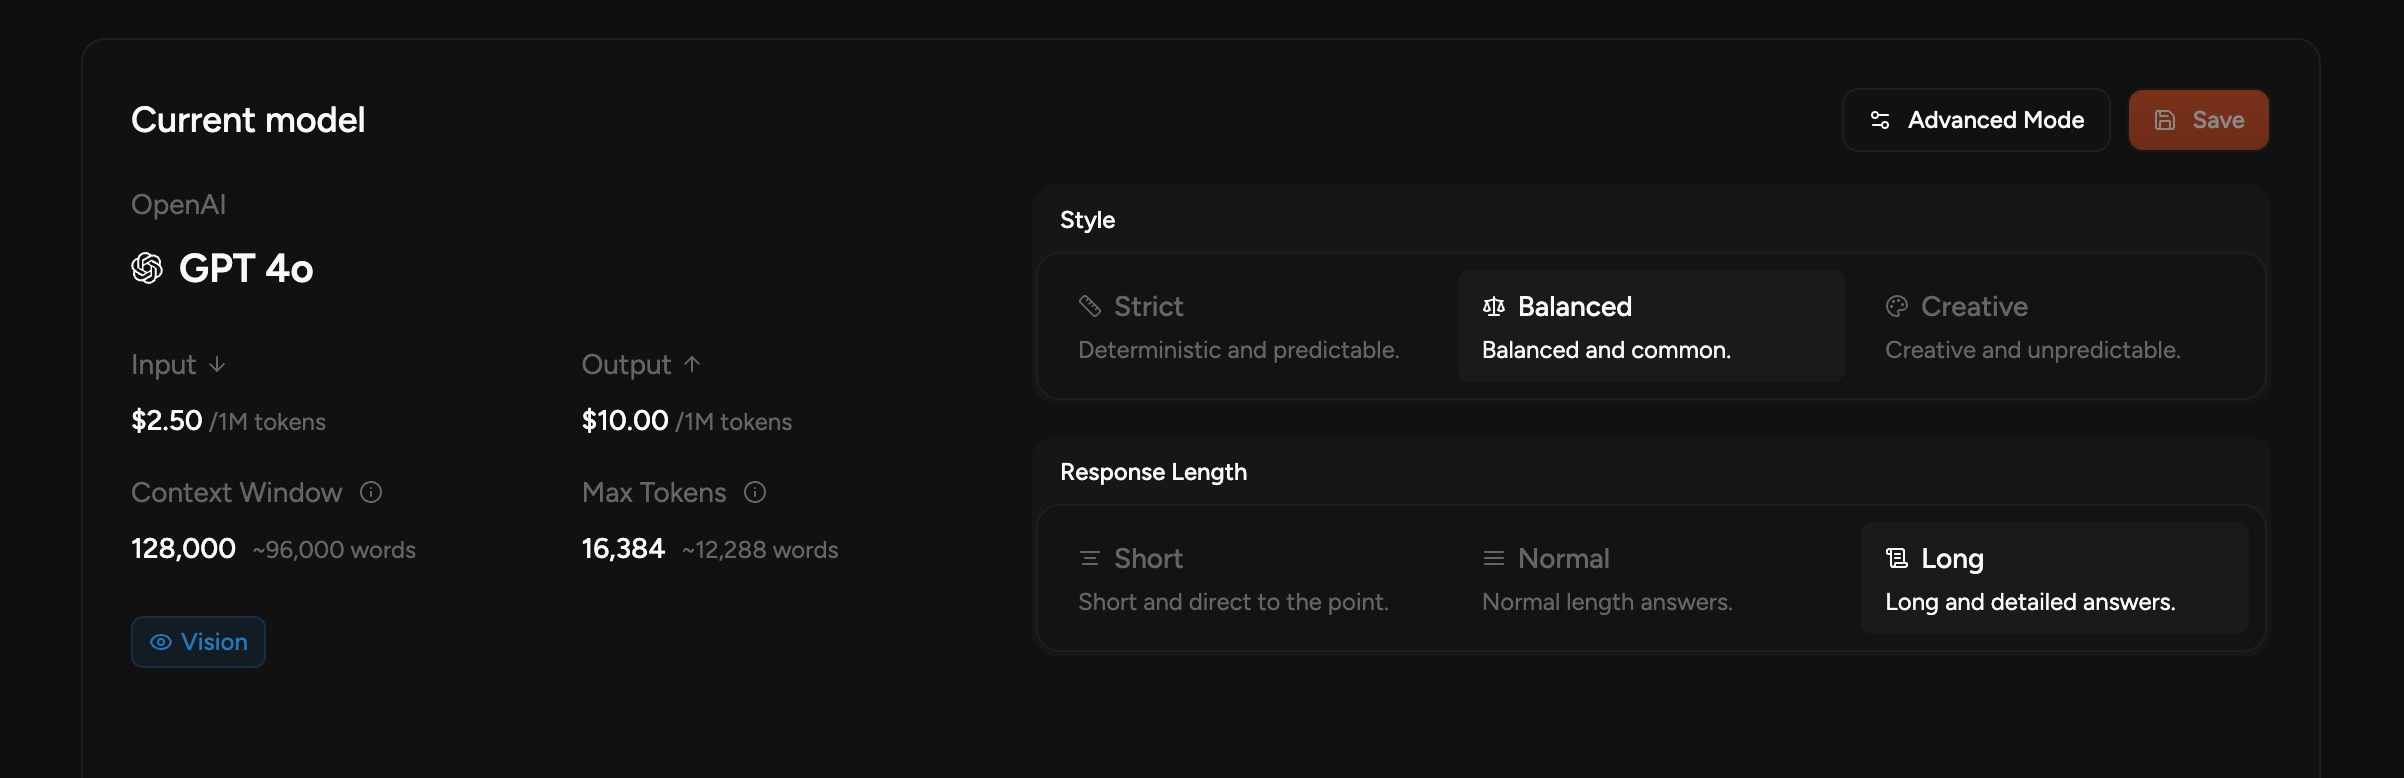
Everything starts in the dashboard, where you will create a Workflow. A Workflow represents a functionality in your app, in this case, the support chat.-
Create a Workflow called “Support Chat”.
-
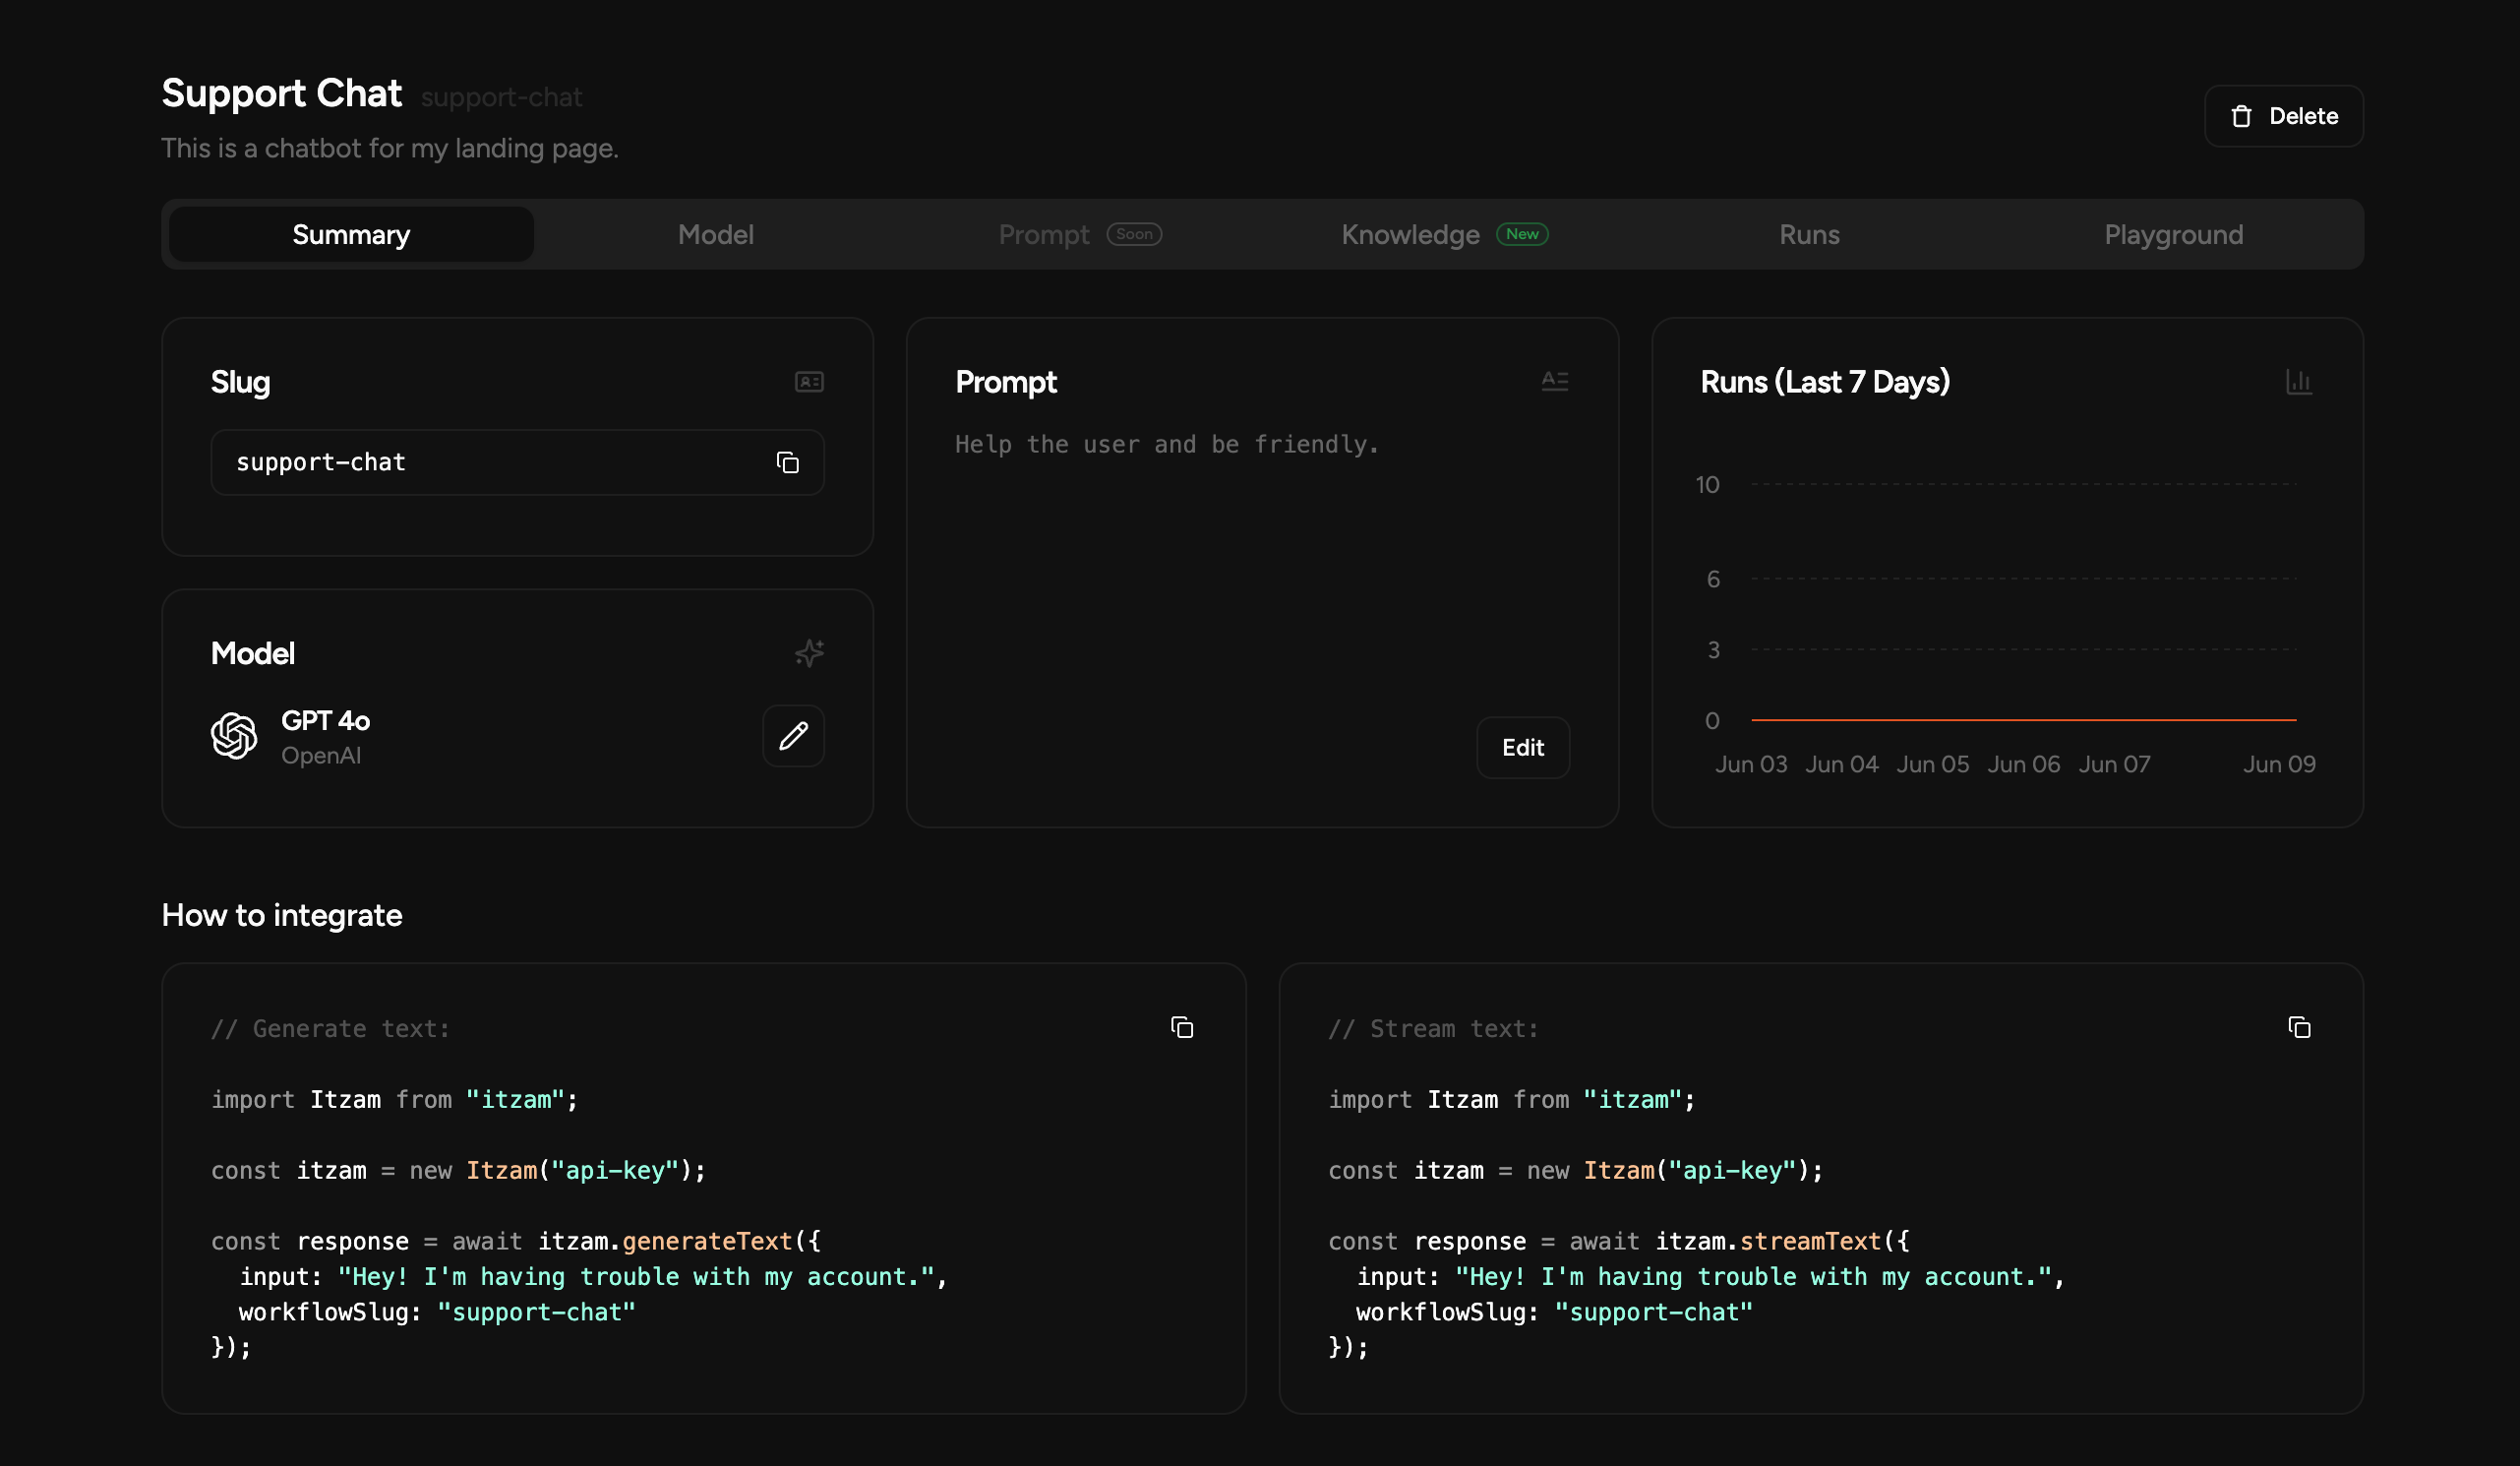
Inside your Workflow you can configure:
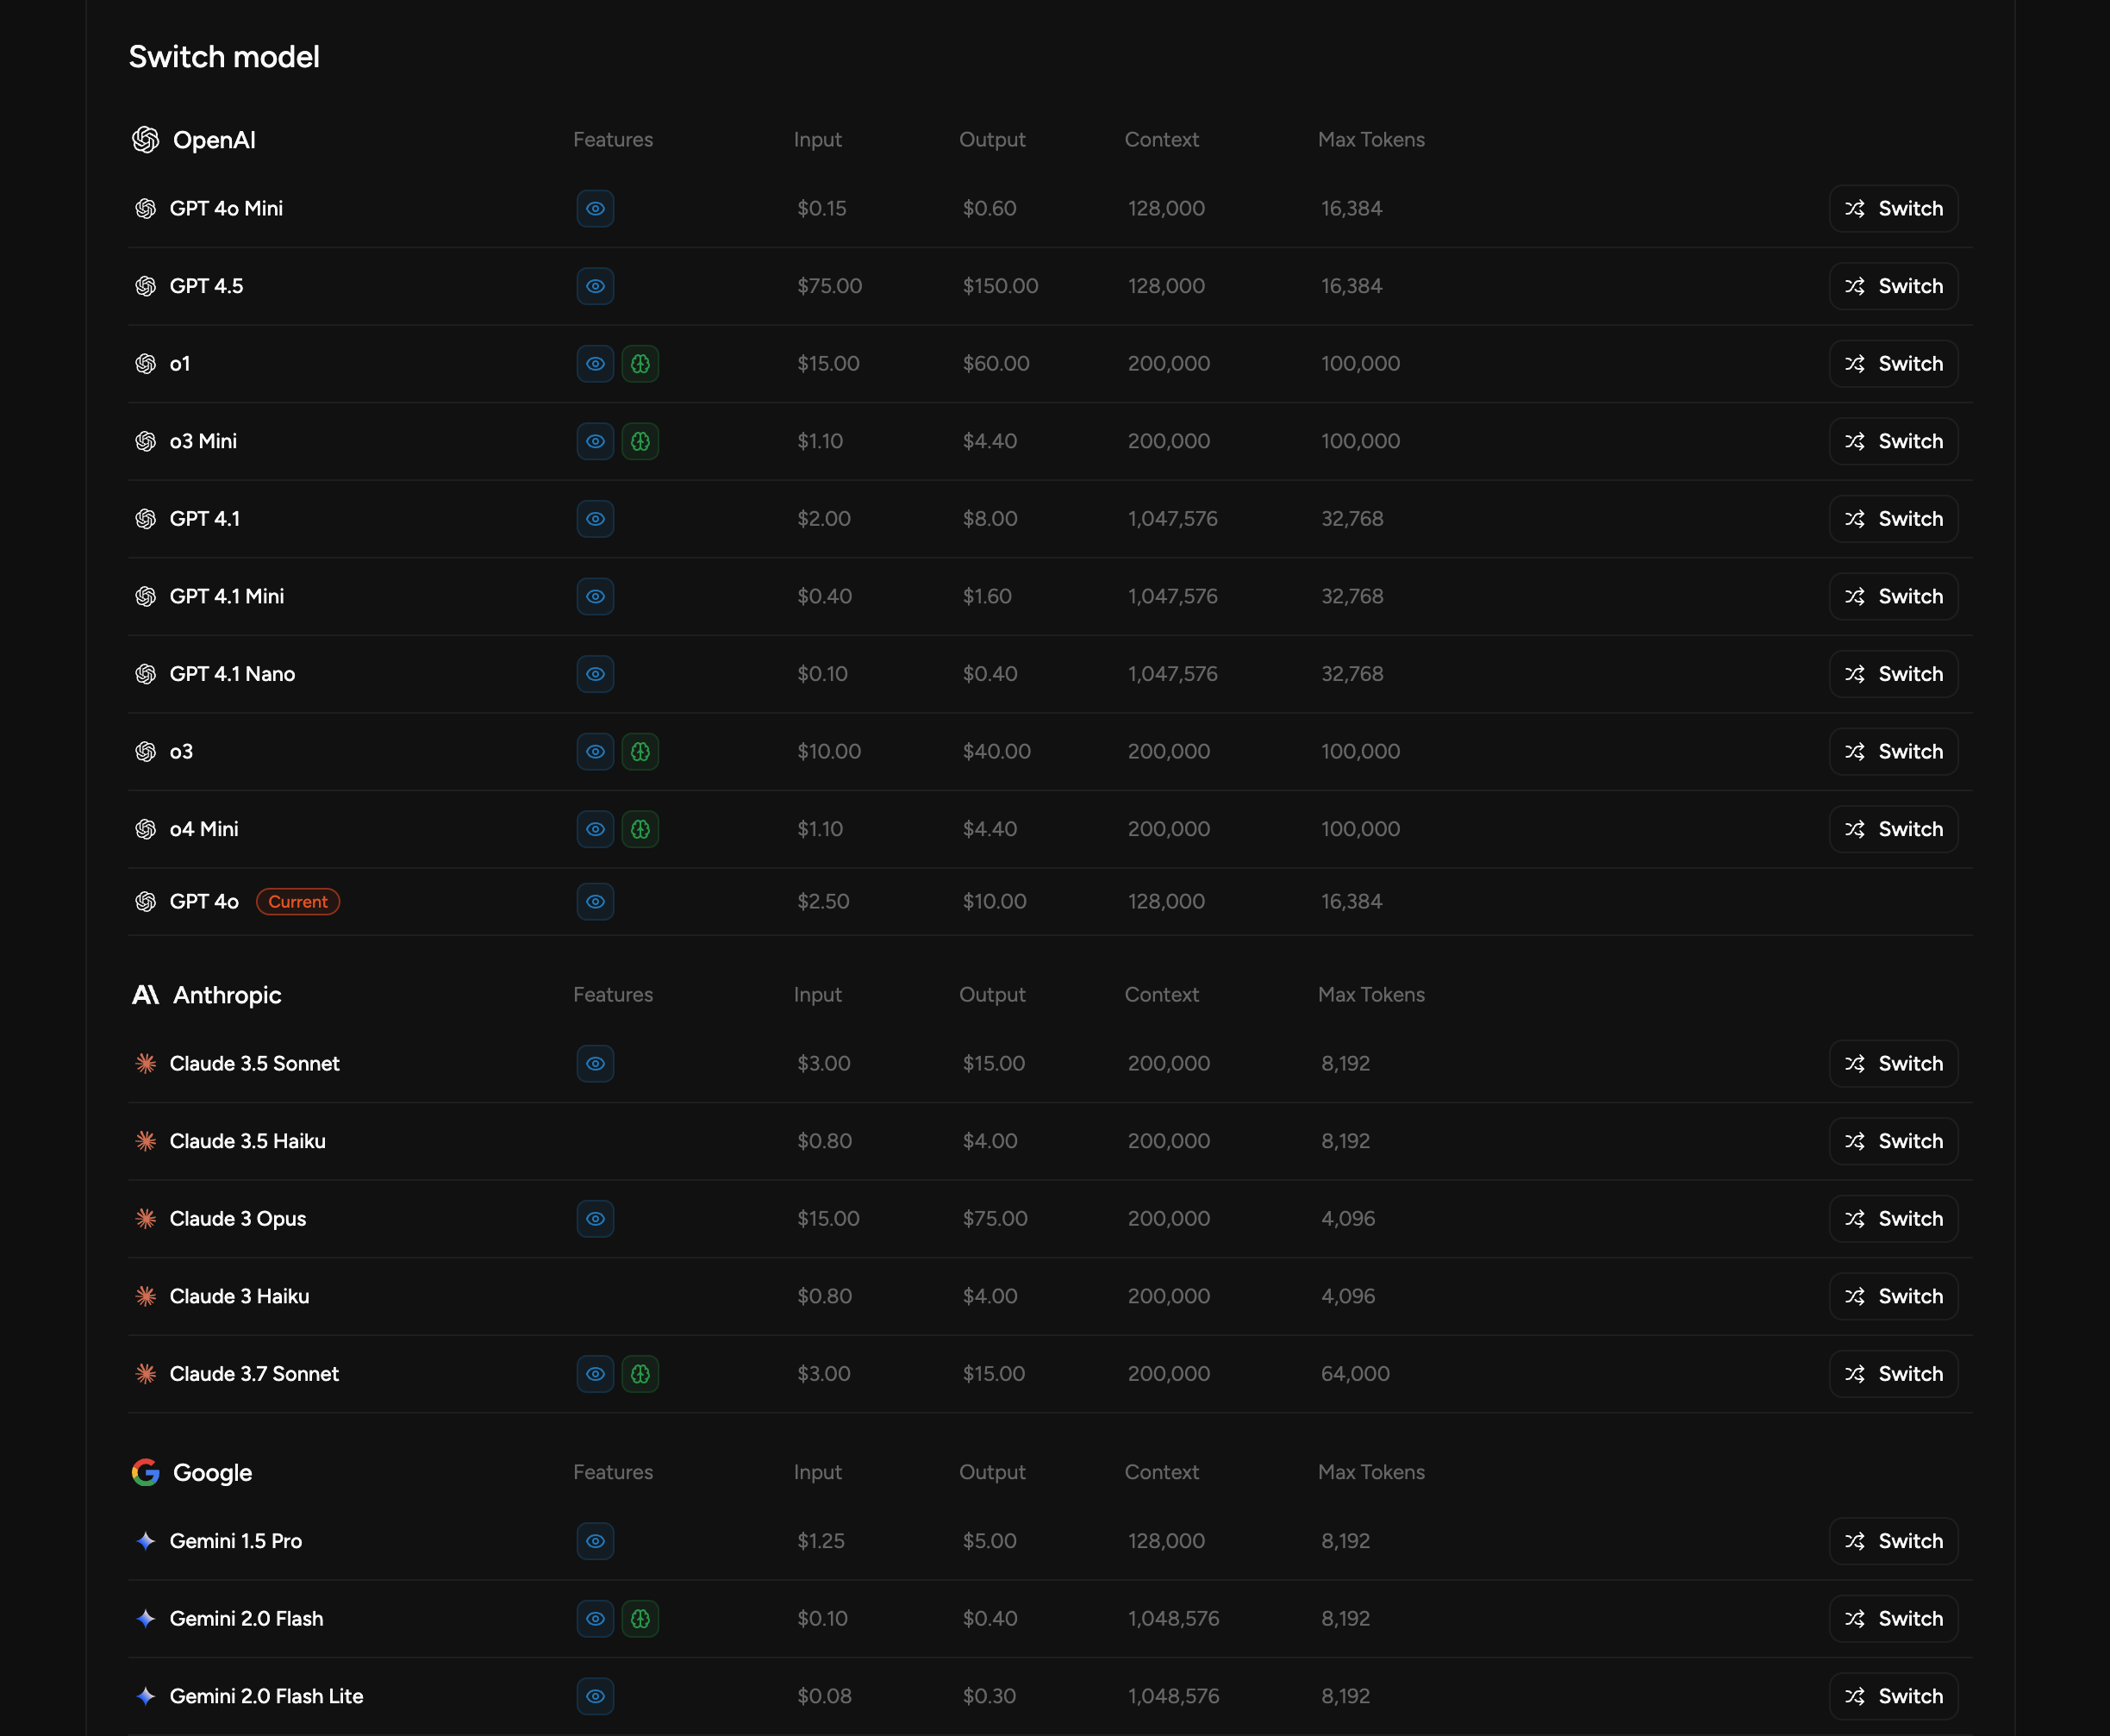
- AI model (GPT, Claude, Gemini)
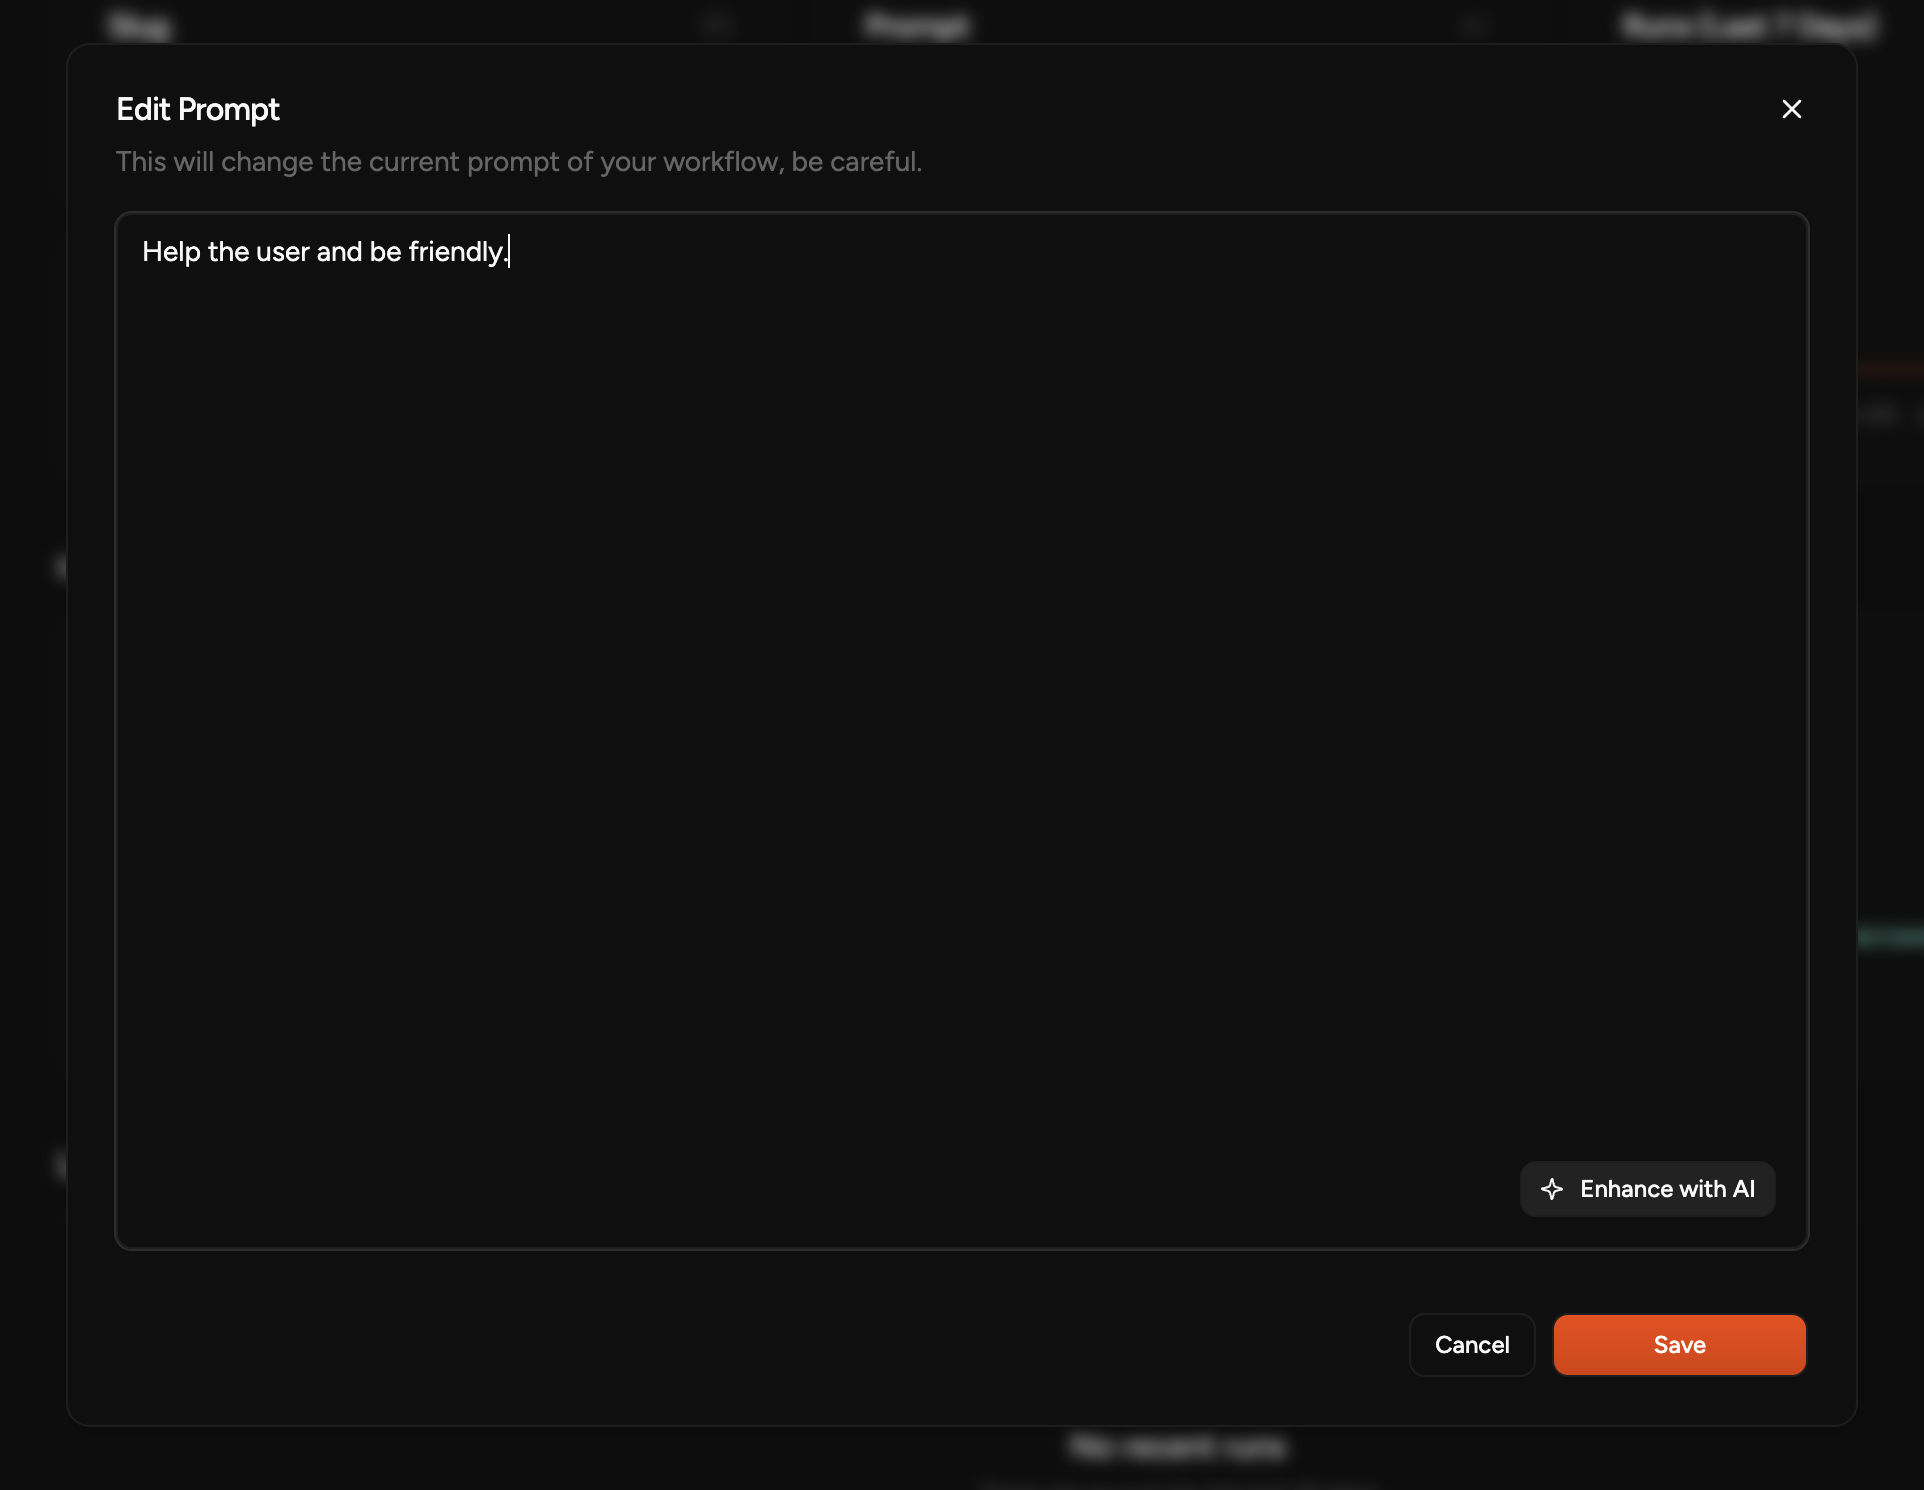
- Prompt (e.g. “You are a customer support agent from Acme Inc…”)
- Model settings (response length, style)
- Knowledge (what the model will use as context, e.g. docs, links)
-
Now create a new API key in the dashboard.

-
Great! Now grab this Workflow’s slug (in this case,
support-chat) and your API key and let’s integrate!
SDKs
- Install the SDK:
- Use the API key to authenticate:
- Use the Workflow’s slug to run it with your user’s input:
API
If you prefer, you can also use the API directly.Nice work! 🎉
You have created your first Workflow and integrated it in your app. Now you can manage everything about it in the dashboard. You can:Change the AI model
Update the model settings
Tweak the prompt
Add knowledge (docs, links, etc.)

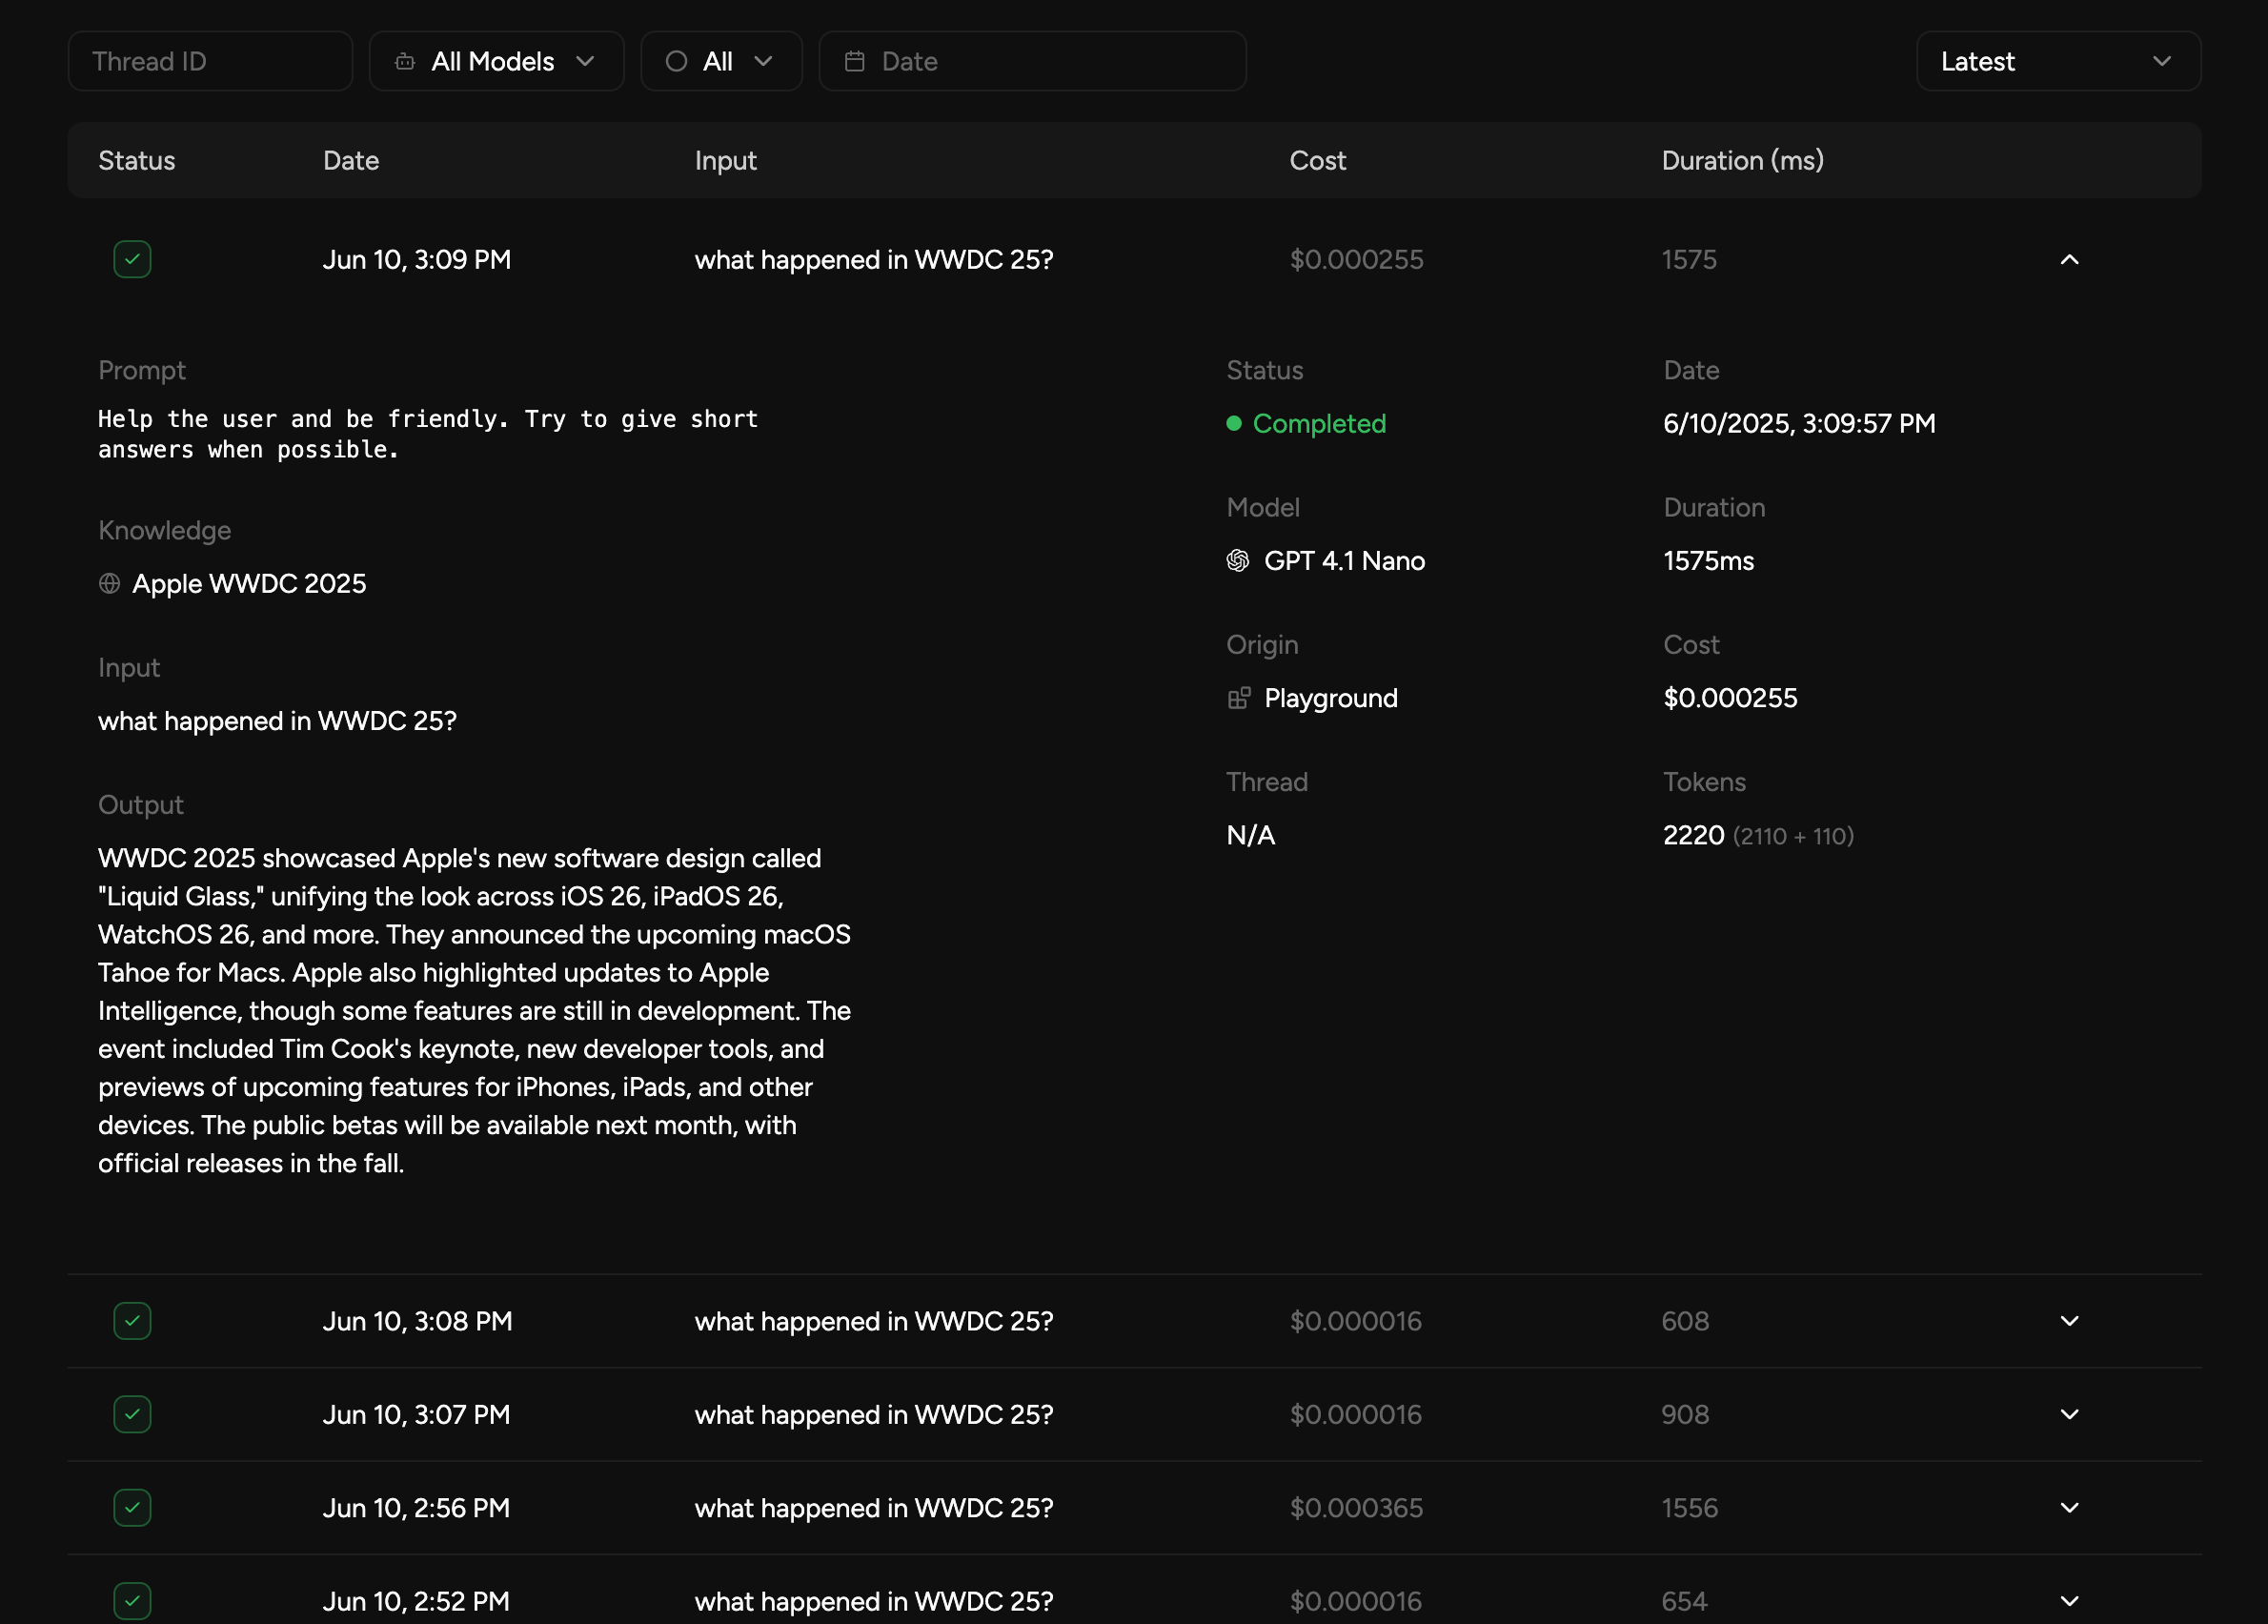
Check your runs
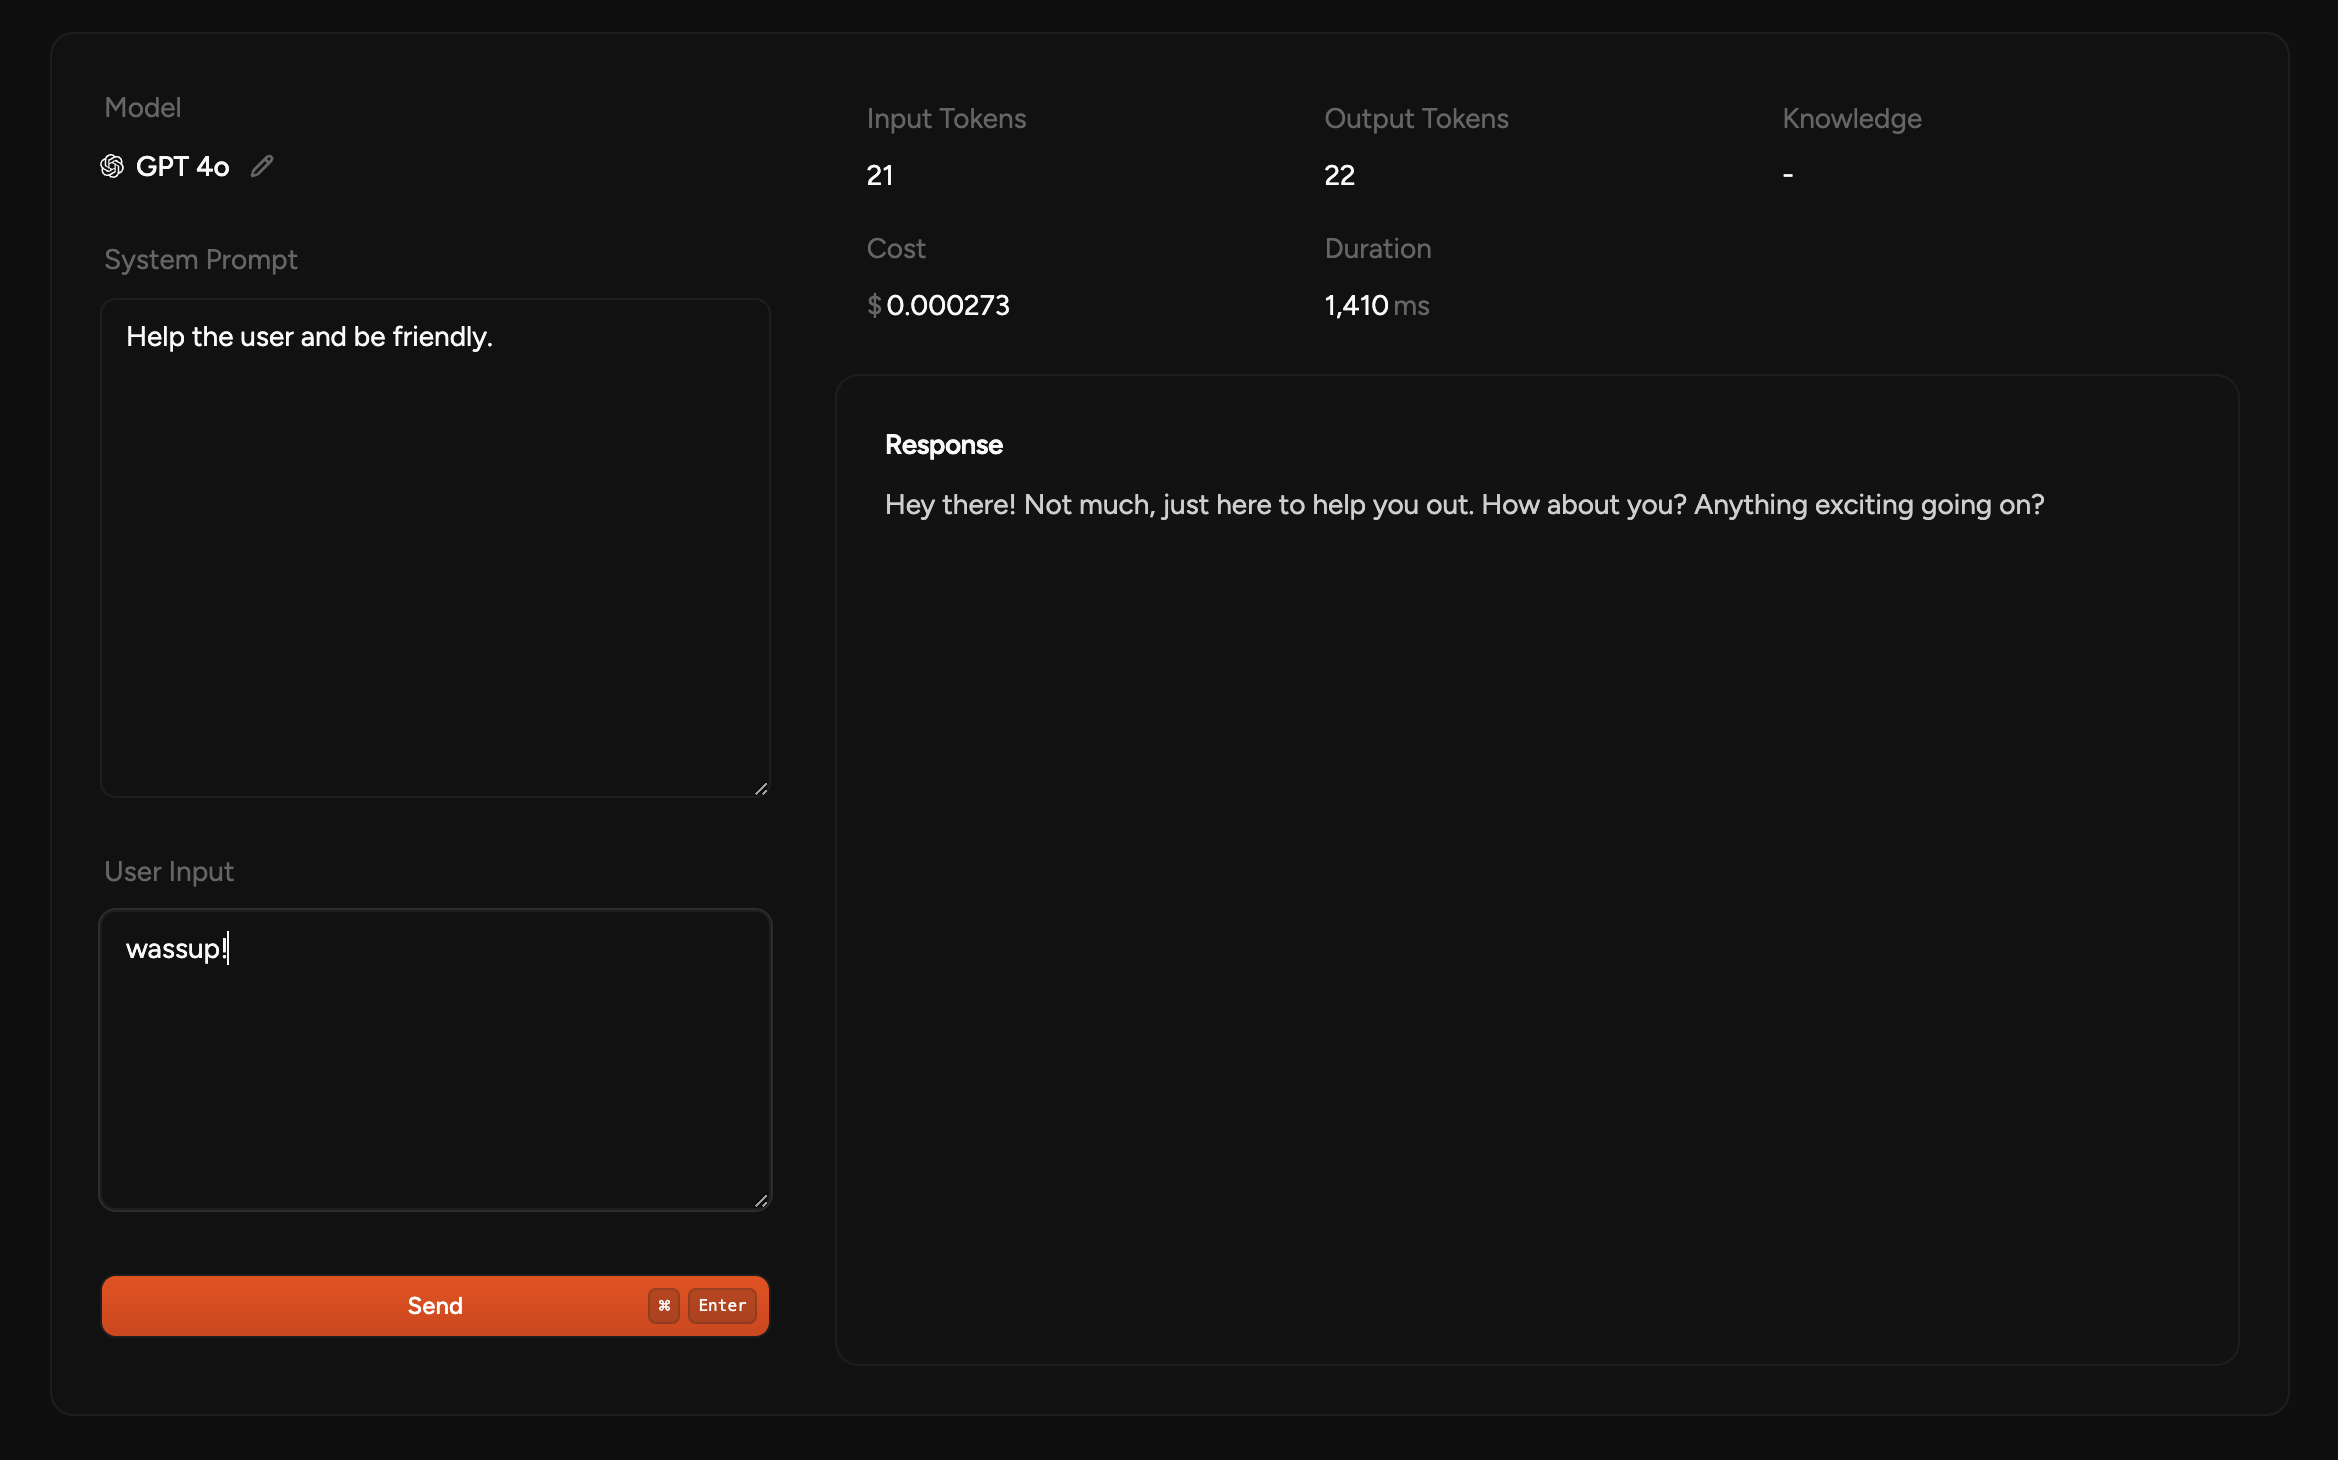
Make tests in playground